Difference between revisions of "I2M Conversion Tool"
From crtc.cs.odu.edu
| (6 intermediate revisions by the same user not shown) | |||
| Line 1: | Line 1: | ||
| − | + | == Loading Bar == | |
| + | |||
| + | In mid –June, I began gathering the code for the Image to Mesh Conversion tool and gaining a better understanding of the tool’s capabilities. Before I could start changing the code, I needed to understand how to build the tool in Windows by using QT, ITK, and VTK. Kevin gave me a step by step Readme.txt file that explained how to build QT, ITK, VTK, to generate the files needed to build the Image to Mesh Conversion Tool. There were a few errors, that I encountered when I first compiled the code, but I asked Kevin about the issues and we came up with a temporary fix. Root has granted me local admin rights, and I am now able to download and install any other software that I need to continue my research. | ||
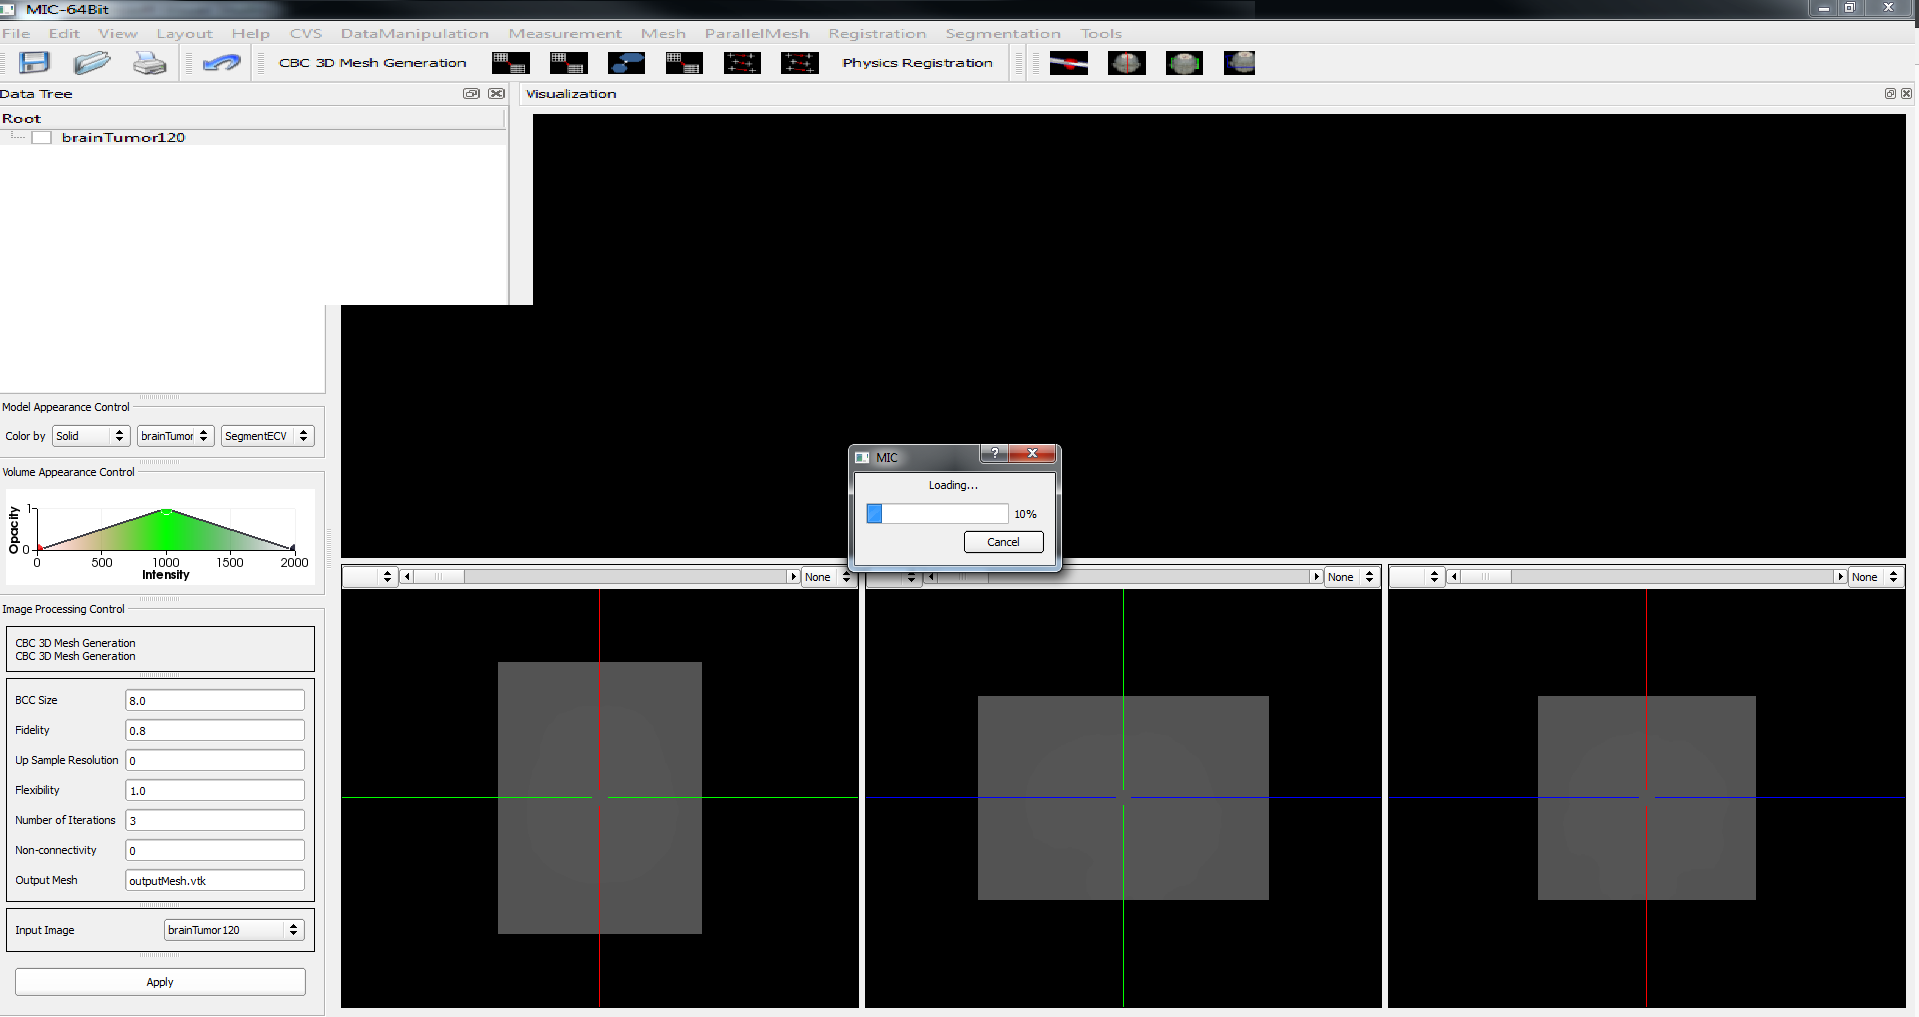
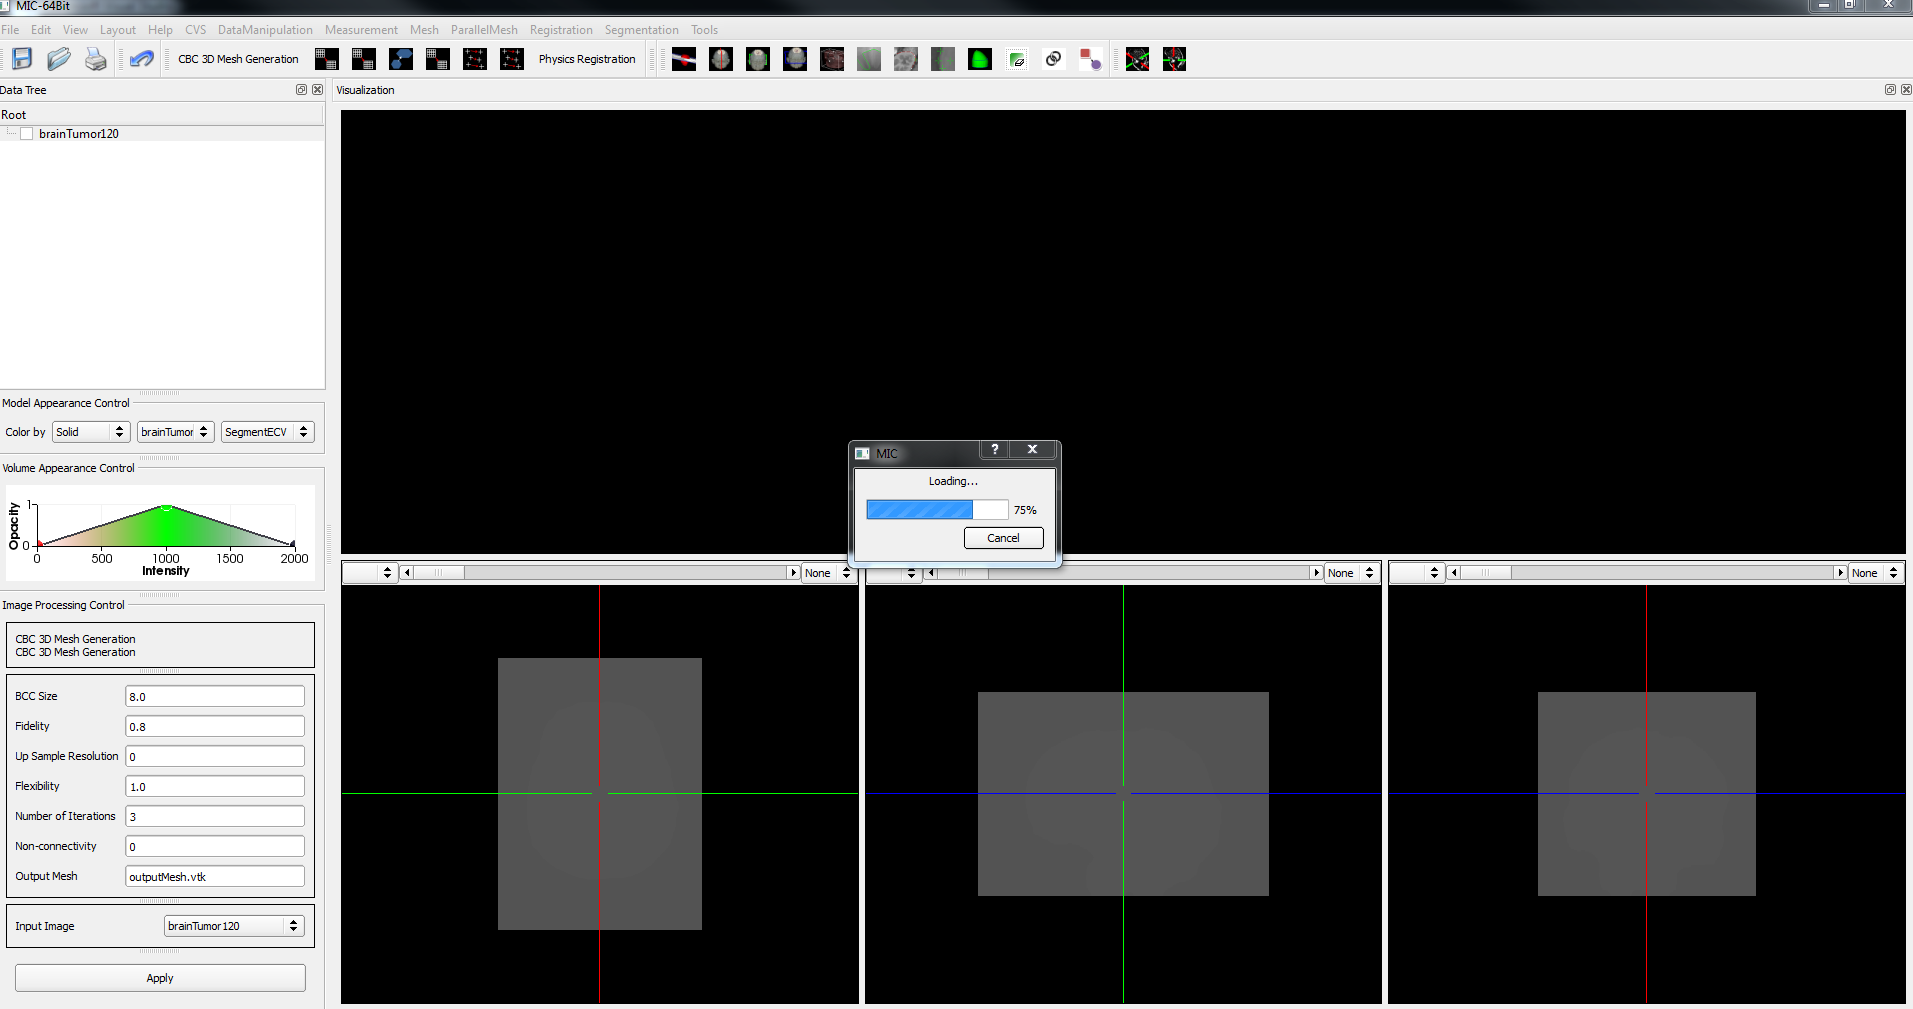
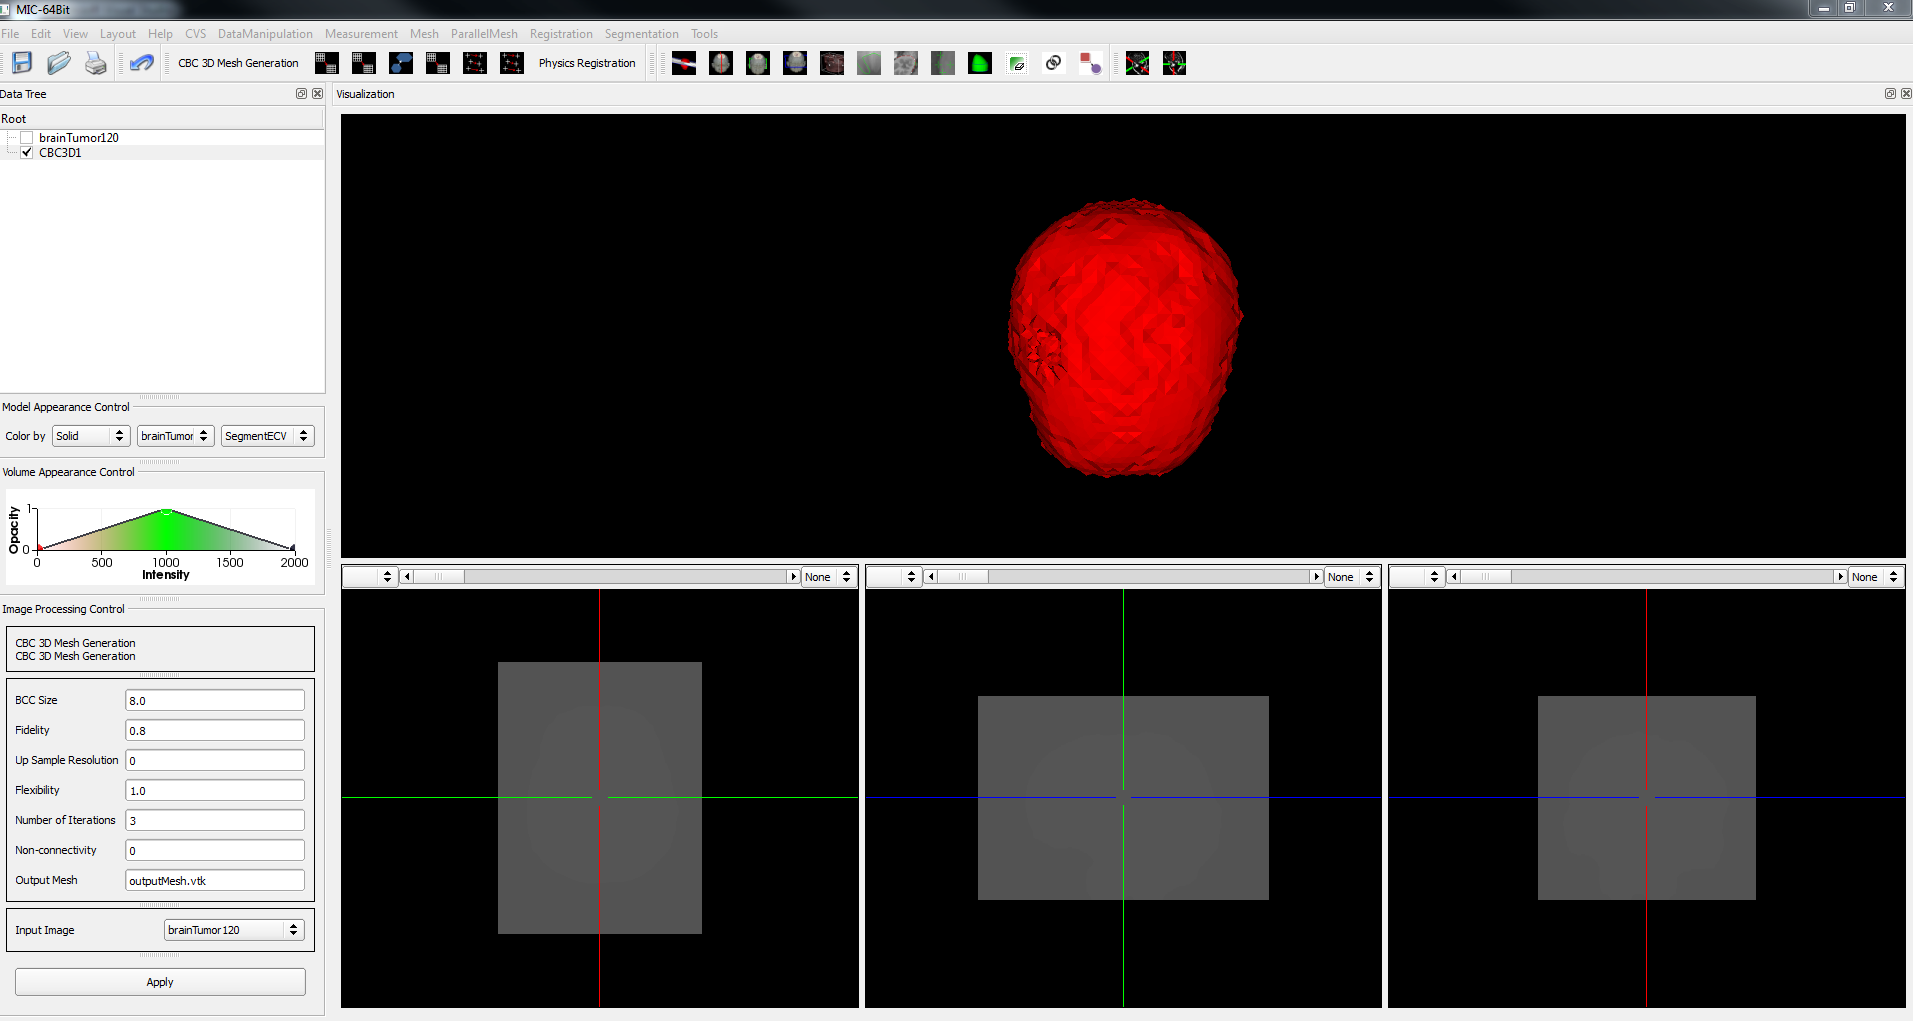
In late June, I started creating a test loading bar for the Image to Mesh Conversion tool to track the progress of mesh generation. The loading bar pops up in the middle of the screen and shows the progress in percentage based on the time it takes it read the input image, generate the mesh, warp the mesh, compress the mesh, and write the output mesh. I would like to change the position of the loading bar to the bottom right of the screen instead of having it popping up in a new widget in the middle. I will be finding out a way to change the position of the loading bar and I will be researching ways to implement a feature to display a multi-tissue labeled mesh using different colors, and ways to implement a feature that will allow the user to cut a cross-section of a mesh to view its interior. I will also start learning about machine learning, so that I will be able to experiment with CBC3D in the future. | In late June, I started creating a test loading bar for the Image to Mesh Conversion tool to track the progress of mesh generation. The loading bar pops up in the middle of the screen and shows the progress in percentage based on the time it takes it read the input image, generate the mesh, warp the mesh, compress the mesh, and write the output mesh. I would like to change the position of the loading bar to the bottom right of the screen instead of having it popping up in a new widget in the middle. I will be finding out a way to change the position of the loading bar and I will be researching ways to implement a feature to display a multi-tissue labeled mesh using different colors, and ways to implement a feature that will allow the user to cut a cross-section of a mesh to view its interior. I will also start learning about machine learning, so that I will be able to experiment with CBC3D in the future. | ||
<div><ul> | <div><ul> | ||
{| style="border-spacing: 2px; border: 1px solid darkgray;" | {| style="border-spacing: 2px; border: 1px solid darkgray;" | ||
| − | ! style="width: | + | ! style="width: 500px;" | |
| − | ! style="width: | + | ! style="width: 500px;" | |
| − | ! style="width: | + | ! style="width: 500px;" | |
|- | |- | ||
|- style="text-align: center;" | |- style="text-align: center;" | ||
| | | | ||
| − | [[File:10%.PNG| | + | [[File:10%.PNG|525px|10%]] |
| | | | ||
| − | [[File:75%.PNG| | + | [[File:75%.PNG|525px|75%]] |
| | | | ||
| − | [[File:100%.PNG| | + | [[File:100%.PNG|525px|100%]] |
|- style="text-align: center;" | |- style="text-align: center;" | ||
||||'''I2M Conversion Tool Loading bar Example for the CBC3D Module''' | ||||'''I2M Conversion Tool Loading bar Example for the CBC3D Module''' | ||
|} | |} | ||
</ul></div> | </ul></div> | ||
| + | |||
| + | == Multi-Tissue Labeled Mesh == | ||
| + | |||
| + | '''Goal''':implement a feature that will display a multi-tissue labeled mesh using different colors | ||
| + | |||
| + | == Cut Cross Section of a Mesh == | ||
| + | |||
| + | '''Goal''':implement a feature that will allow the user to cut a cross-section of a mesh to view its interior | ||
| + | |||
| + | == Machine Learning in the CBC3D Module == | ||
| + | |||
| + | '''Goal''':experiment with Machine Learning in the CBC3D Module | ||
Latest revision as of 19:30, 27 August 2018
Contents
Loading Bar
   In mid –June, I began gathering the code for the Image to Mesh Conversion tool and gaining a better understanding of the tool’s capabilities. Before I could start changing the code, I needed to understand how to build the tool in Windows by using QT, ITK, and VTK. Kevin gave me a step by step Readme.txt file that explained how to build QT, ITK, VTK, to generate the files needed to build the Image to Mesh Conversion Tool. There were a few errors, that I encountered when I first compiled the code, but I asked Kevin about the issues and we came up with a temporary fix. Root has granted me local admin rights, and I am now able to download and install any other software that I need to continue my research.
   In late June, I started creating a test loading bar for the Image to Mesh Conversion tool to track the progress of mesh generation. The loading bar pops up in the middle of the screen and shows the progress in percentage based on the time it takes it read the input image, generate the mesh, warp the mesh, compress the mesh, and write the output mesh. I would like to change the position of the loading bar to the bottom right of the screen instead of having it popping up in a new widget in the middle. I will be finding out a way to change the position of the loading bar and I will be researching ways to implement a feature to display a multi-tissue labeled mesh using different colors, and ways to implement a feature that will allow the user to cut a cross-section of a mesh to view its interior. I will also start learning about machine learning, so that I will be able to experiment with CBC3D in the future.
Multi-Tissue Labeled Mesh
Goal:implement a feature that will display a multi-tissue labeled mesh using different colors
Cut Cross Section of a Mesh
Goal:implement a feature that will allow the user to cut a cross-section of a mesh to view its interior
Machine Learning in the CBC3D Module
Goal:experiment with Machine Learning in the CBC3D Module


